Destination Wedding Photography Tips
- Jul 27, 2017
- 6 min read
First off, welcome to the Photographers' Cooperative website. I, along with rest of the merry band of cohorts who make up the team behind this venture welcome you to this adventure. It is our hope that we provide the photography world with passionate content that is unencumbered by ever changing algorithms and stays true to our love for the art, science, and creativity of photography.

A PHOTOGRAPHER'S DREAM
Every photographer's dream has to be traveling to a distant land to ply their craft. It does not matter if the photographer specializes in landscapes or weddings, at some point in our photography lives we need to pack our bags and make that adventure. I recently had the pleasure of knocking out my first destination wedding in of all places, Costa Rica. With this introductory article, I would like to give those fellow dreamers and adventurers some tips from my learning experience. As with any advice column, your mileage may vary but at the end, I would love to read feedback from those photographers who have been there before and perhaps learned something that I should have included.
PREPARATION IS THE KEY
First things first, acquire a passport if you wish to travel internationally. One of my photography goals for 2017 was to get a passport so I could make my photography talents available outside of the United States if need be. I had no time frame on when I would get the passport, but early in the year, a text message from a good friend changed things up. Instead of "whenever I get around to it," I was now on the hook to get my passport as soon as possible.

If you are an American citizen living within the friendly confines of the US borders, you can head over to the State Department's website and find out what you need to do. Even though you do have the options of getting just a passport card or a passport book, take it from me, bite the bullet and get both. One thing I found refreshing was the wait time. The State Department's website usually advertises approximately a 6 week waiting period from the time the application is turned in to the time you will receive your passport. I do not know if it was just the time of year or what, but I had my passport in two weeks. Another friend had applied around the same time and received hers in two weeks, as well.
So now we have our passport, what's next to consider? The next step for me was figuring out the ins and outs of what I would need to do legally. Do I need permits, etc? For my adventure to Costa Rica, we used a travel agent who already had a working relationship with the location where the wedding would be held. To keep it simple, I just asked her if she would take care of gathering that information for me and she did. While I had no obstacles in regards to permits, you'll need to research the location you will be going to. I have read that other places do not even allow outside photographers and if they do, there are permits to be acquired and I am sure extra fees. Again, your mileage may vary and it is important that you fully research every aspect about your destination wedding. It would suck to haul 40 pounds of camera gear through 3 airports all day just to show up and get shut down.
We have our wedding, we have our passport, we have the information regarding permits; what's next? Along with having a travel agent handle my transportation in and out, to and fro; the location also had a wedding coordinator. I was able to find contact information on the website of the resort the wedding was being held at and several weeks before the wedding, I reached out to her and introduced myself. Once I arrived at the resort the day before the wedding, I was able to meet up with the coordinator and we had a meeting to go over details. I am the type of wedding photographer who appreciates a good wedding rehearsal, it makes shooting the wedding a breeze. In the case of this particular wedding, there was no rehearsal. The coordinator took me on a tour of the grounds and the ceremony location. This allowed me to visualize the ceremony beforehand. The tour also allowed me to find out if there were any areas we could not use to shoot.
GEAR TALK
At this point, the stress was not over. I had to come up with a list of camera gear that would be going and that would be staying. I also had to decide what gear would go in my carry on bag and what gear would go in my checked bag. A very simple rule to live by when it comes to air travel and photography gear is "whatever you need at a minimum to complete the shoot." That means lens and camera body goes on the plane with you. Then there is the issue of backups. There are several different options out there, but I decided that I would have the wedding images stored three ways. I had enough memory cards to allow me to keep the images on the cards until I returned home. I also took my laptop, which went on my carry on bag, and that would be my second backup. Lastly, I took a 32 gb USB drive and backed up all the images onto that also. Overkill perhaps, but better to be safe than sorry.
Although the basics will stay the same no matter the location, packing for the location is something a photographer has to do. In the picture below shows most, but not all of the microfiber towels I packed for the trip. During the wedding, I had at least one towel on me, and another two to three that were in the bag. It was Costa Rica, rainy season, on the beach. Stuff was going to get wet either from the ocean or the humid induced sweat showers. By the time we were done shooting, at least one towel was completely soaked from my sweat. Me personally, even though I was wearing cargo shorts and a lightweight polo, I was soaked from head to toe. My feet made off easy as they were soaked with ocean water.

This picture is of my room immediately after the ceremony. I emptied my camera bag, took the camera apart and let it dry out. Even though it did not get wet, between the humidity and sweat, it was better to be safe than sorry. Why you don't see is microfiber towels and clothes hanging. Yes, it was a very wet affair and it did not even rain.

Luckily, my wife had a suitcase that is conducive for traveling wedding photographers. The bag has two separate compartments. One is well suited for tripods and light stands. The other works great for clothes. The bag also has interior tie down straps. I was able to use these to tie down the stands and tripod. The straps put my mind at ease doing the gear would not be jostled around by the airline.

In my carry on, I had two Yongnou 560-IV flashes, a 560-TX transmitter, Magsphere, spare AA batteries, a small, flashlight, two camera bodies, three lenses, wired remote, several small microfiber towels and lens cloths, tripod ball head, phone charger and other little assorted odds and ends. I also had my Vanguard VEO tripod attached to the outside of the bag. My camera bag ended up being stuffed. My checked bag weighed in at 45 pounds, I am sure the camera bag was not that far off. Yes, my camera bag became the bane of my existence for several days. But this is what we do to make sure we can get the shots we want.
CONCLUSION
So that's that. The experience was great. The sky did not really cooperate with us though. We did not let that deter us. The couple was pretty happy with the wedding gallery.
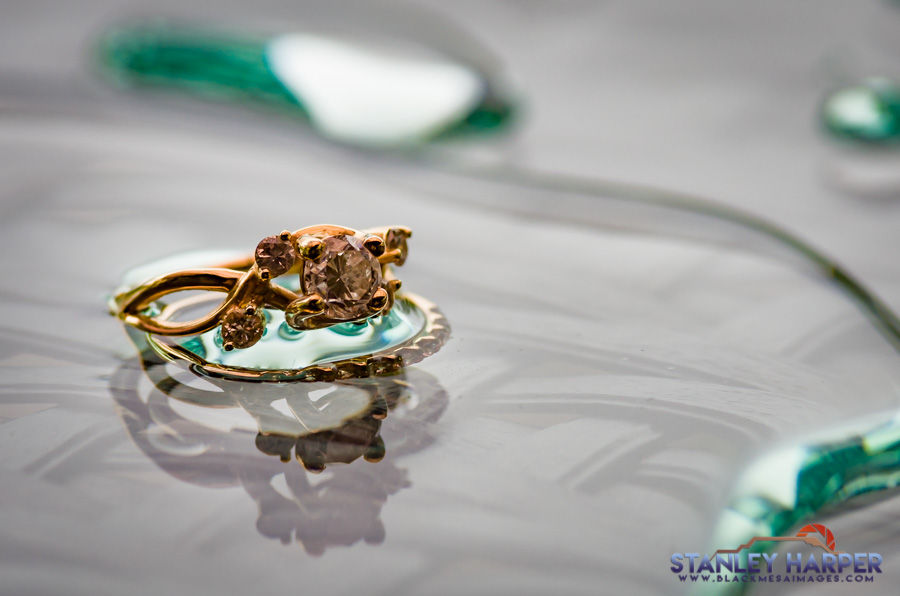
What would I do different for the next wedding? I would leave the 70-200 home and have two suitable replacements take it's place. The 70-200 is by far my best portrait lens in my toolkit. The lens also does macro, which I would need for the ring shots. I would have rather had a shorter range macro and taken the 70-300. The 14mm could have been left home also. My research showed that there was an off-chance I would get to shoot the Milky Way, but that did not happen.
If you would like to read a little more about my experience, feel free to hit up my personal blog about the trip here.

Feel free to watch the video slideshow that I created of the wedding:
Comments